Hello everyone! Today I want to go over a very important OWM tool, the Art Manager. I hope this tutorial helps take some of the mystery out of it!
Overview
Other World Mapper lets you import and manage art files through the Art Manager. You can find the Art Manager under the Tools menu.
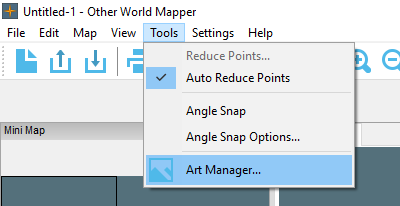
It’s also the last button on the Tool toolbar.

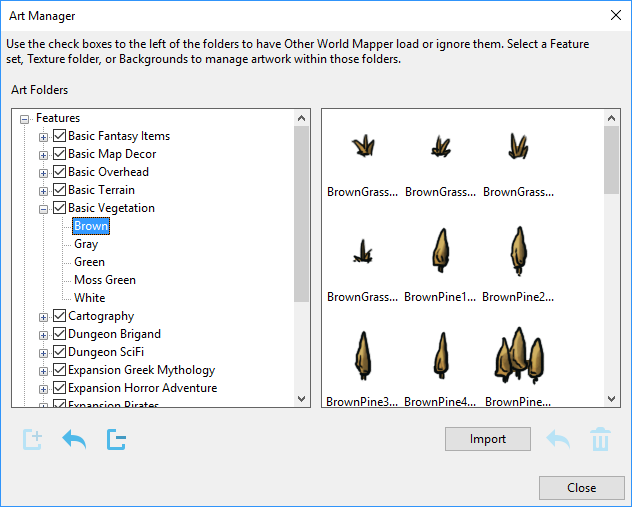
On the left you see four root folders which you cannot delete: Features, Textures, Borders, and Backgrounds. These are the folder where the artwork for OWM is stored. Click the + next to folders to show sub-folders.
You can also see buttons at the bottom which are tools for managing art. I’ll go over those in detail later.
Showing and Hiding Sets
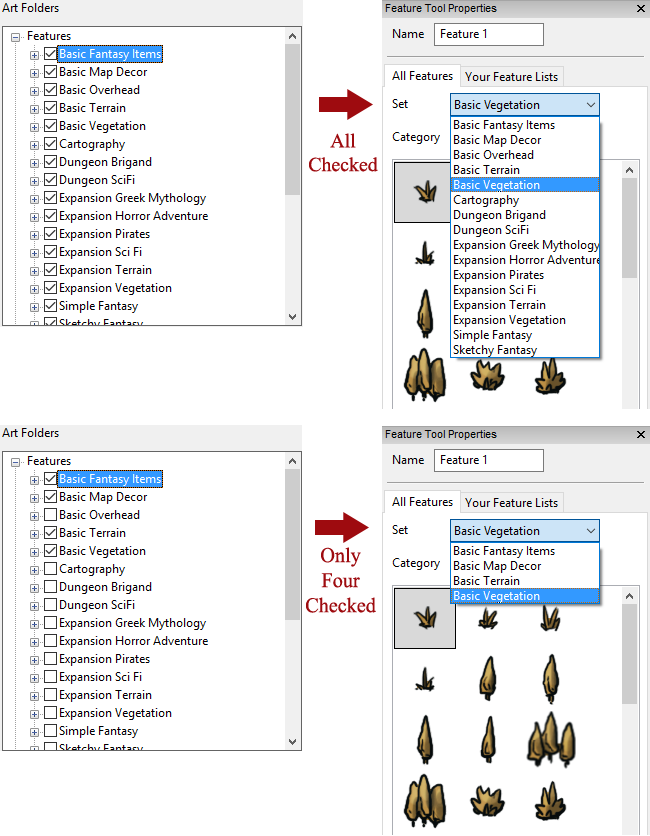
So, there are lot of sets in the art folders. When you’re using OWM tools all of these files show up in art lists. It can get annoying scrolling though them all to find the folder you’re looking for. That’s where the check boxes next to the set folders come in.
Uncheck the box to hide the art set from art set lists. This will not delete the folders! It will only hide them. You can go back at anytime and recheck them to have them appear in the program again.
Adding Folders
OWM has a specific folder structure for each of the art types.
- Features → Art Set → Category → Art Files
- Textures → Texture Set → Art Files
- Borders → Frames → ArtFiles
- Borders → Corners → Art Files
- Background → ArtFiles
To create new folders, click the New Folder button at the bottom left. This will expand the New Folder options. Choose if you want to add folder(s) for Features or Textures.
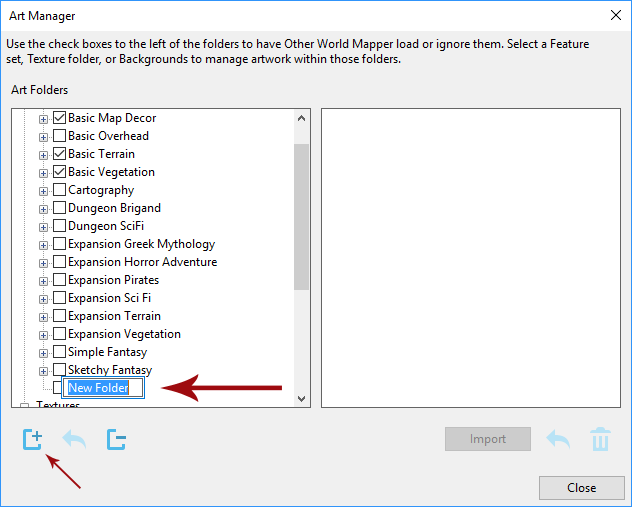
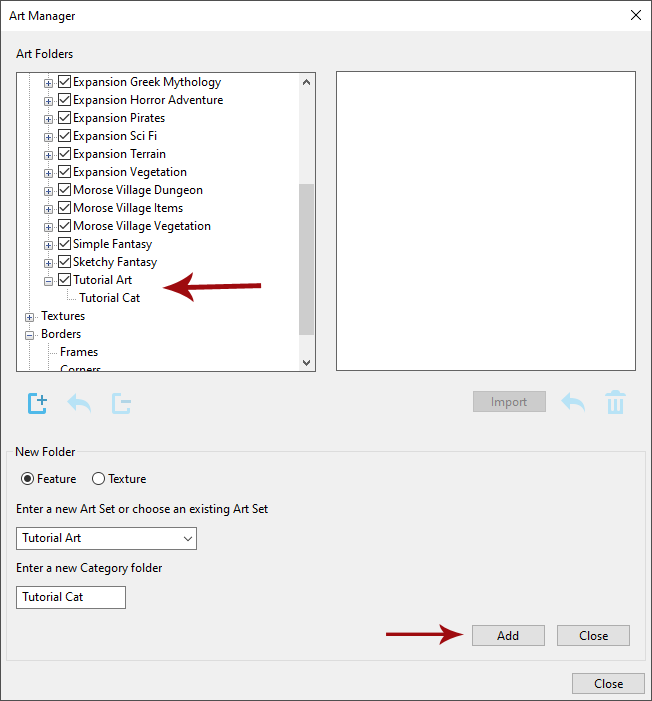
If you want to add Feature folders, you can type a new Art Set name or select an existing Art Set, then type in a new Category name. Then click Add and the folder(s) will be created and added to the list under Features.
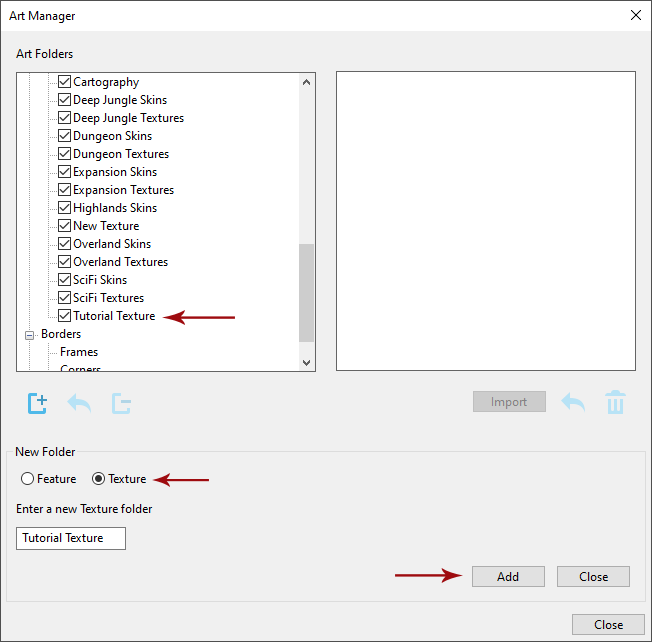
To add Texture folders, select the Texture options. Then type in a new folder name and click Add.
When you’re finished adding folders, click the Close button to hide the New Folder options.
Managing Folders
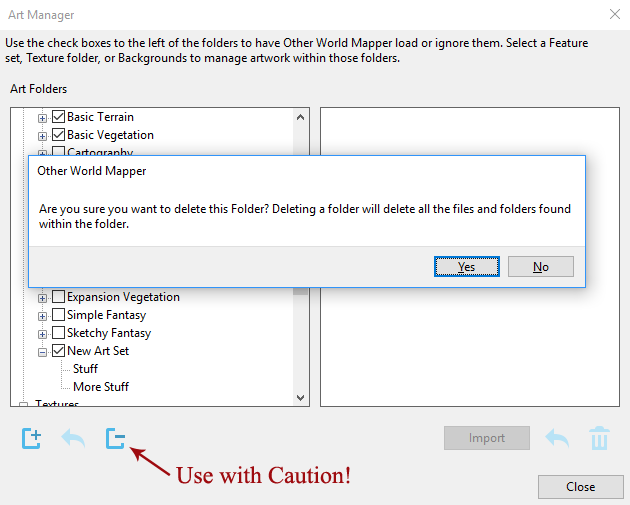
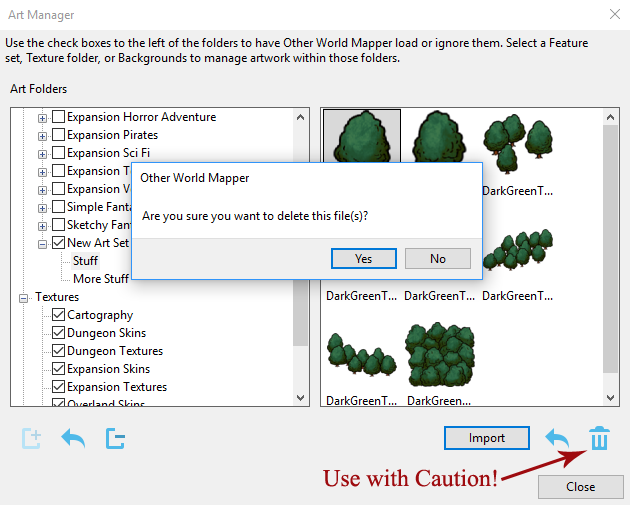
You can use the Delete Folder button to delete a selected folder. Use this button with caution, because it will delete the folder, and all the files in it, from your computer!
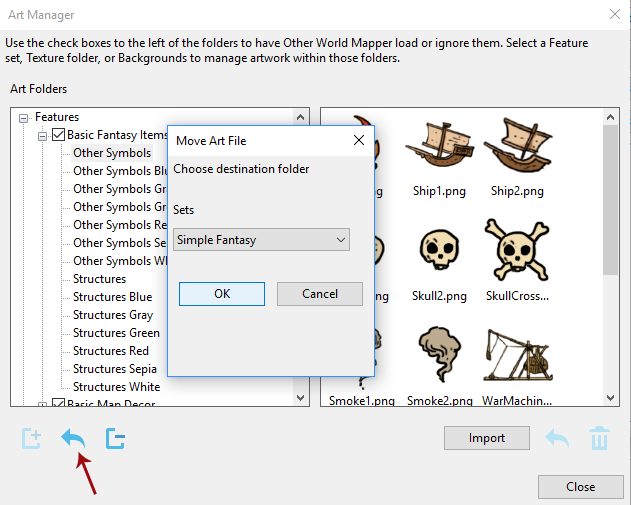
You can use the Move Folder button to move Category folders to a different Art Set folder. A window will pop up and ask you to pick a new location for the folder.
Importing and Managing Art Files
Because OWM forces a folder structure, you must first create folders to imported art files into. Please refer to Adding New Folders above.
Once you have your folders created you can begin importing files!
Currently OWM supports png, jpg, bmp, tiff and svg, and we plan to have gif available soon.
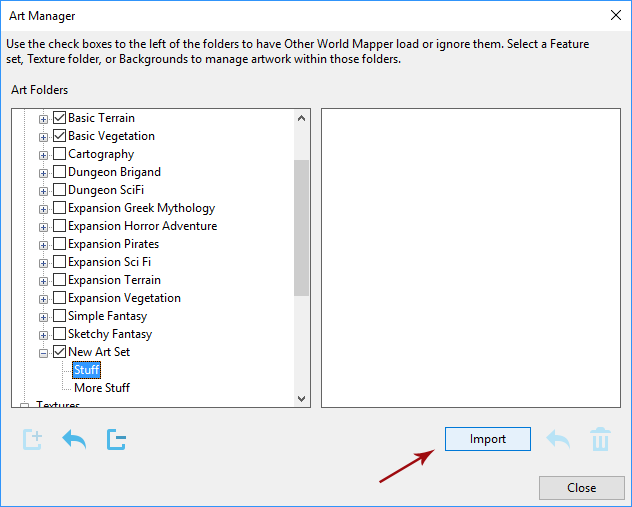
In the screenshot below you can see that I’ve created a folder called “New Art Set” and two sub-folders, one titled “Stuff” and the other titled “More Stuff.” I’ve also selected the “Stuff” folder and you can see that the “Import” button is now available.
Click on the Import art button. A browser window will open. Navigate to the files you want to import into the selected folder. You may select multiple files at once.
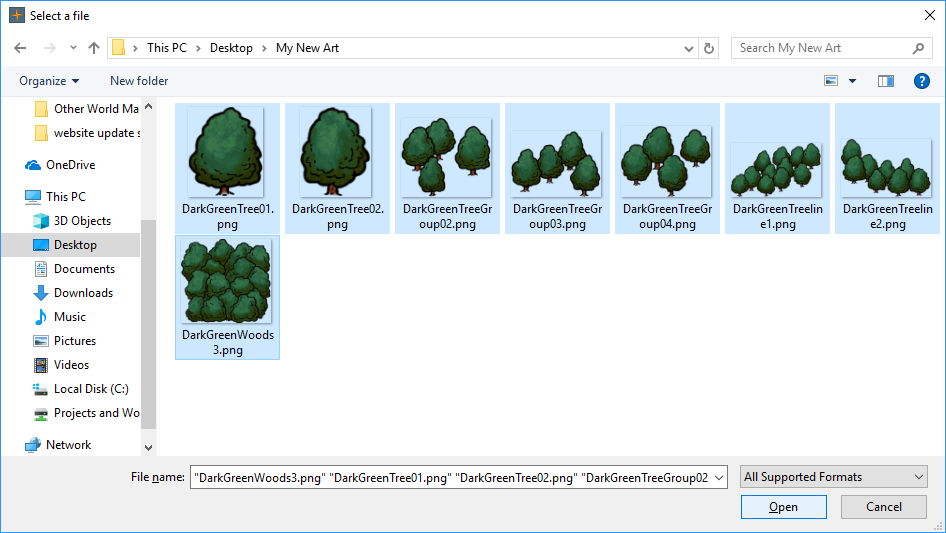
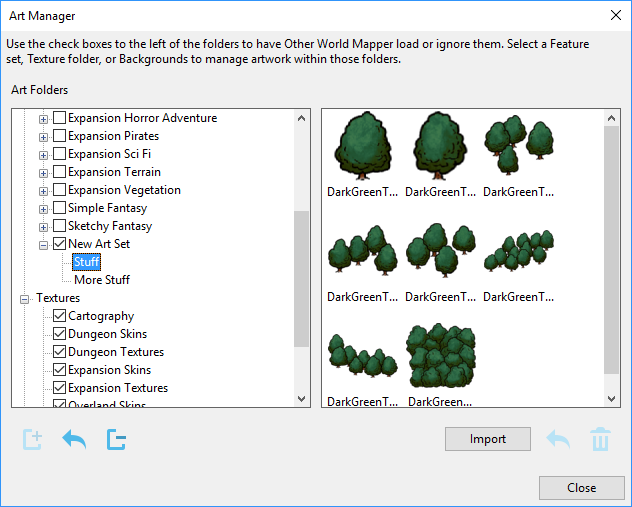
Now just click “Open” and the files will be imported!
Note: It is recommended that you use the Art Manager to import files. However, you can copy files directly to OWM’s art folders which can be found under the installation folder. As long as you respect the file structure OWM will load the art files the next time you run the program or the next time you close the Art Manager.
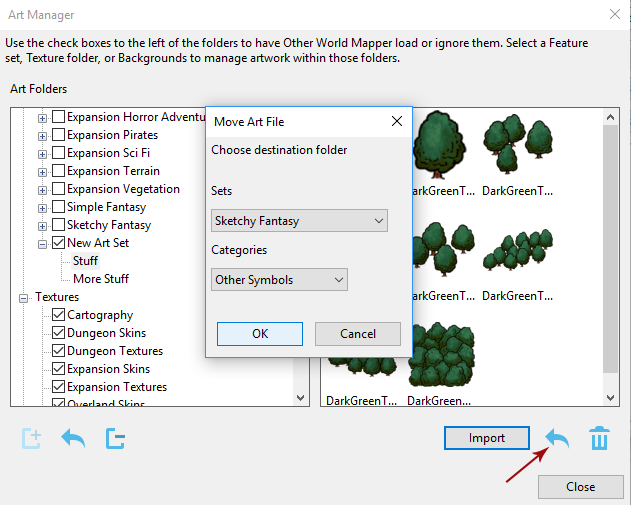
You can move an art file to a new folder by clicking the Move button on the bottom right. A window will pop up and ask you to pick a new location for the file.
You can delete a file by clicking the Delete button on the bottom right. Same as the folders, use this button with caution, because it will delete files from your computer!
Once you’ve made all the changes you would like, you may close the Art Manager. When you click the Close button, the Art Manager will check for any changes you made and apply them to the program. This can be a little slow sometimes, so please be patient with it!
And that concludes this tutorial. We hope you find it useful! Please feel free to comment and to ask us any questions you may have.
-Stephanie
Permalink
When I am uploading one of my own features, how do I ensure the background is transparent? Currently my images have white boxes around them.
Thanks
Permalink
The best option is https://www.online-image-editor.com/
1. Drag an image from your computer to the upload box
2. Click on the “Advanced” tab
3. Click on “Transparency” button
4. Click the drop down box next to “Filltype”
5. Change it from “Floodfill at selected color” to “Replace selected color”
6. Click on the color that you want to remove
7. Click on “Save” button
8A. If you want to download the new image, click on “Save image local” button
8B. If you want to retrieve the image without downloading it, drag image to your “Pictures” folder
Permalink
When importing our images, how do we make the backgrounds transparent? At the moment everything I import has a white box around it.
Permalink
I think I replied to your question in the forums, but in case I didn’t sorry for the very late reply!
You have to create the images with a program that supports transparency information (or download images that have them). I.e. if you use MsPaint it will flood fill the image you save with a white background.
– Alejandro
Permalink
Okay, so the delete works UP, deleting not just the blank folder but up to the parent folder. Nice. Manged to ruin every map I made by losing the Sketchy Fantasy folder.
Now how do I get this back?
Permalink
Okay, I found my DL email and reinstalled OWM. Problem solved.
Permalink
We just made a new release, but we’ll add a warning with the next release about editing OWM artwork and confirmation.
Thank you!