Summary
Each item in Other World Mapper is drawn on its own layer and some items can be drawn or placed on others as children. Items can be managed through the Edit menu, right click menu, or through the use of the Layers window.
Structure
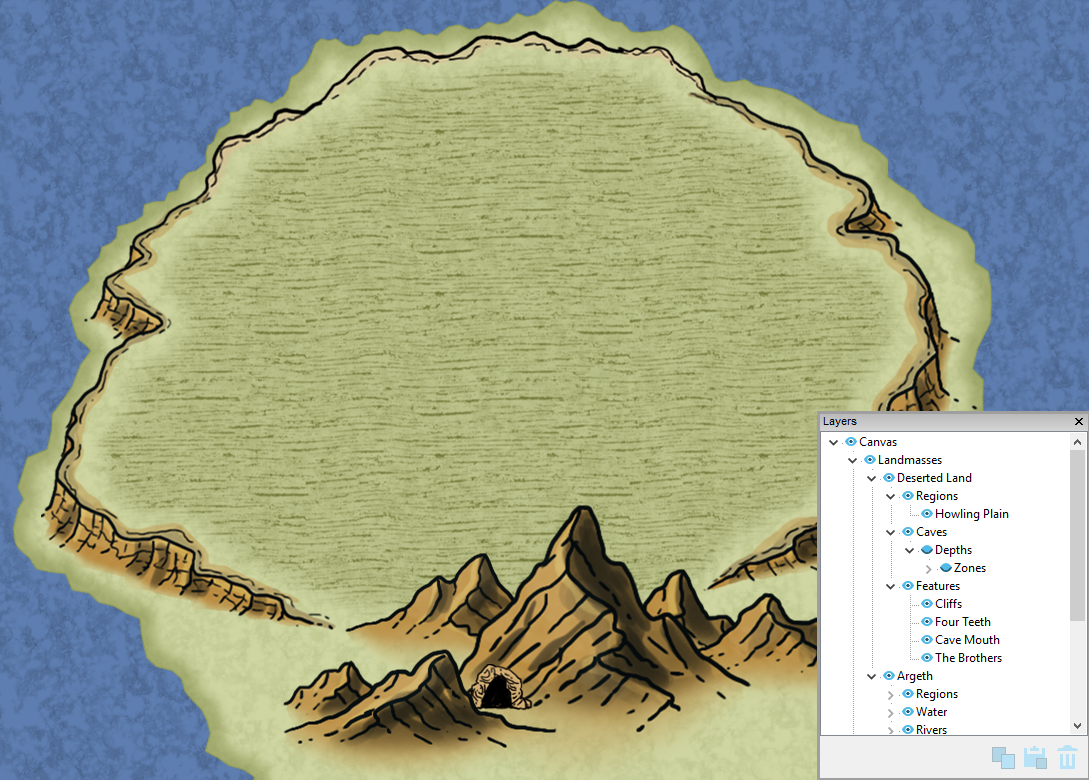
Item’s drawn on the map get added in a specific order based on where and when they are place. You can see that order clearly in the Layers window. Items in the Layers window are listed by their parent and item type. The layers branches can be collapsed and expanded to help mange these items. Items in each layers branch are listed in the order that they’re drawn. So, the first item in a branch will appear ‘behind’ any other item in that branch because it is drawn first.
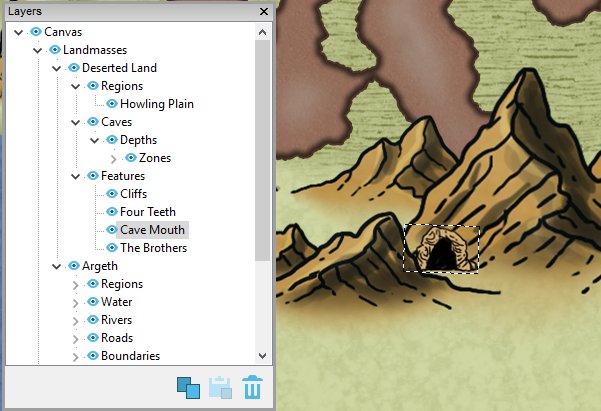
Example:
I placed a feature to my landmass Deserted Land. As soon as I placed it, it was added to the Features branch of Deserted Land in the layers window. I then changed the feature’s name to Cave Mouth. So the full parentage path of Cave Mouth is:
Canvas->Landmasses->Deserted Land->Features->Cave Mouth.
Cave Mouth will appear ‘in front of’ the mountain feature Four Teeth, but ‘behind’ The Brothers.
Some general rules for parentage:
- Landmasses, corridors, closed areas and caves can all be parent items
- Any item can be a child of a landmass (except another landmass)
- Any dungeon item (other than corridor, closed area or cave) can be a child of a corridor, closed area or cave
Item Selection, Centering
You can click on any item on the map in other world mapper to select and modify that specific item. However, in a large a map with many tiny and overlapping items, this isn’t always easy. The Layers window is very helpful here.
Clicking on an item in the Layers window will select that item on your map. Clicking on a layers branch will select all the items in it. This makes it easy to select difficult to click items, like items that are tiny or ‘behind’ another item, or if you can’t remember where you put them. Not that I’ve ever lost a village that way.
Double clicking on an item in the layers menu will recenter the map on that item. This is useful if you want to get to an item quickly or want to find where it is on the map.
Visibility
When working on a map with a lot of items, it’s convenient to be able to hide certain items while you are working on the rest of your map. Hidden items won’t be draw and can’t be selected.
In the Layers window, clicking the eye icon next to an item or branch will hide the item or items and their children. For example, clicking on an open eye next to a landmass will hide the landmass and all items drawn on that landmass. Similarly, clicking on the eye next to Caves will hide all caves on that parent.

Renaming
There are several ways to rename an item. To rename an item from the Layers window, use a slow double click on the item. You can also select an item and rename it from the Properties window. The edit menu also includes an option for renaming.
Copy/Paste/Delete
Any selected item can be copied or deleted using the buttons at the bottom of the layers window. To paste a copied item, select a parent item and click the paste button. This can also be done using the edit menu or keyboard hotkeys.
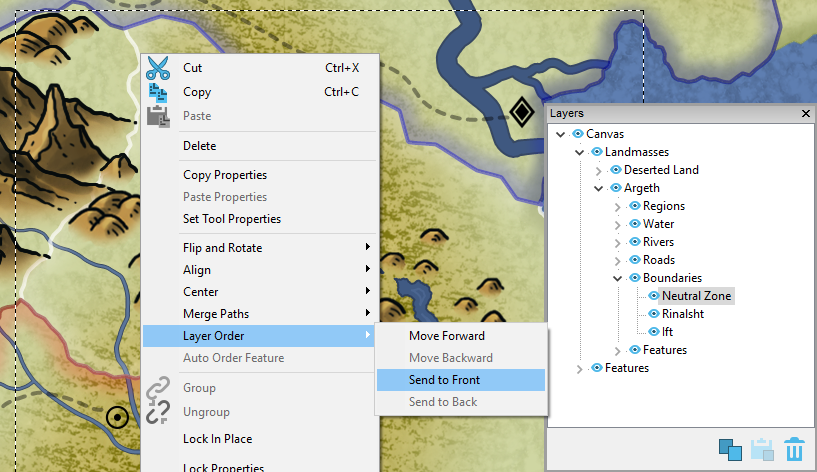
Layer Order
There are two ways to change the order of items in the same “branch”.
One way is to use the layer order options in the edit menu. “Move Forward” and “Move Backward” lets you step an item up or down one level in the layer order. “Send to Front” and “Send to Back” to send the item all the way to the front or back of the layer order.
The second way is to use the layers window’s drag-and-drop, where you literally drag the selected item to the desired spot in the branch list.
Examples:
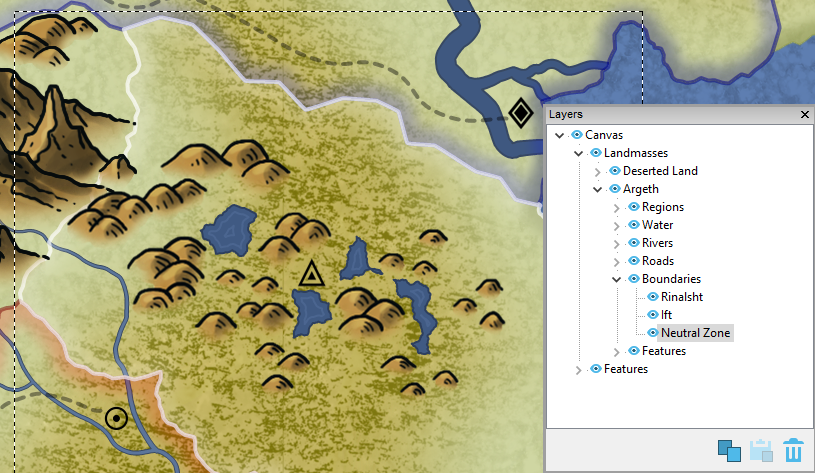
I decide that I want the Neutral Zone to be more obvious, so I select it and use the Layer Order option to bring it straight to the front. Now it’s the last boundary drawn and much easier to see.
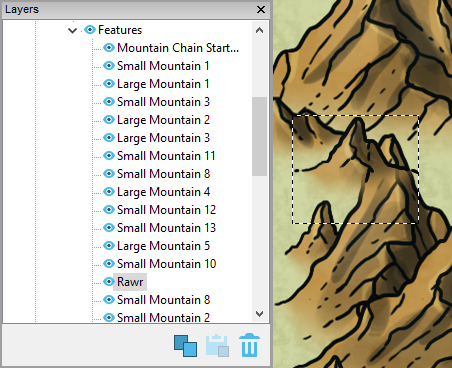
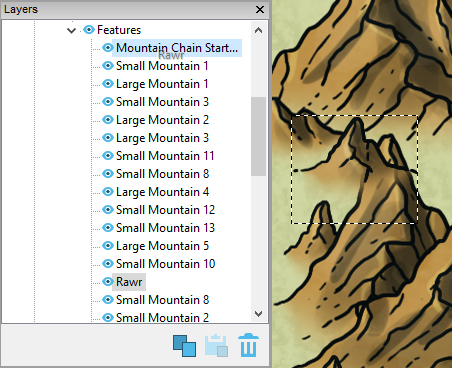
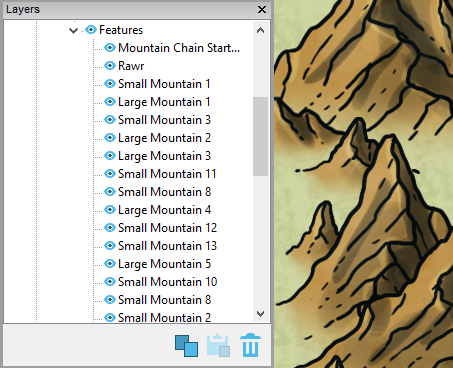
Or I have one mountain out of place (I named it Rawr so it’s easier to see in the muddled mountain mess). So, I select and drag it up until I’m highlighting Mountain Chain Start and then drop it. Rawr is moved to just after Mountain Chain Start and the map updates immediately.
-Katie
Permalink
Hello, How do I cahnge the layer order of parents? I’m having a massive issue where I have a pool and a corridor under it in layers. It will not let me make the corridor the top layer at all.
Permalink
Sorry for the late reply! Currently, the order of item types if fixed. So, in that particular case you cannot move the corridor to be on top of the pool. The fixed order should probably put the pool under corridors (we’ll look into it). We’re also looking into adding more flexibility for order of item types.
Meanwhile, in your case you could put the pool inside of a “dummy” cave item to force the order you need.
Stop by the forums or FB group (or just email us/message us) if you have any other questions!
– Alejandro